
 Tiếng Việt

Digital Ocean provide CDN service with just $5 per month for 250gb and 1TB transfer data, $0.02 for each GB store additional and $0.01 for each GB transfer additional. It is calculate monthly and very clear.
Before signing up, you need an international credit card like Visa or Mastercard or you can also use paypal account.
Step 1. Click here to register an account (you will be given $ 100 to your account).
Click the “Sign Up” button. Fill out the form here and click the “SIgn up with gmail” button. 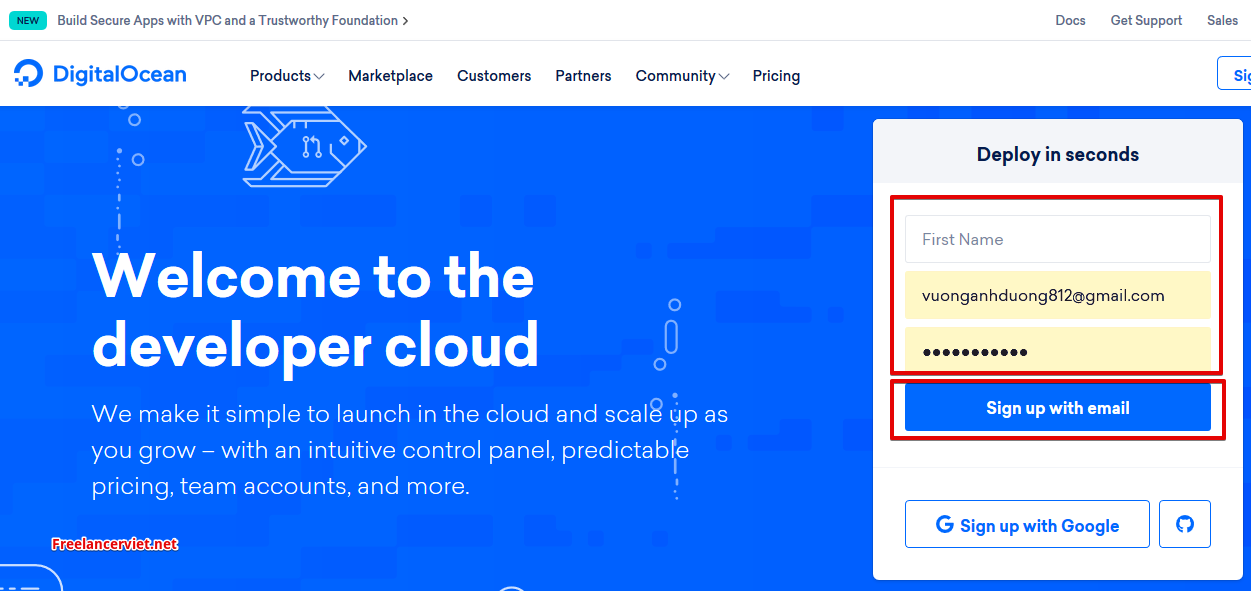
Step 2. Go to the email that you have registered with digital ocean,
Digital ocean has sent you an email to activate your account. In that email, click on the active link to activate the account.
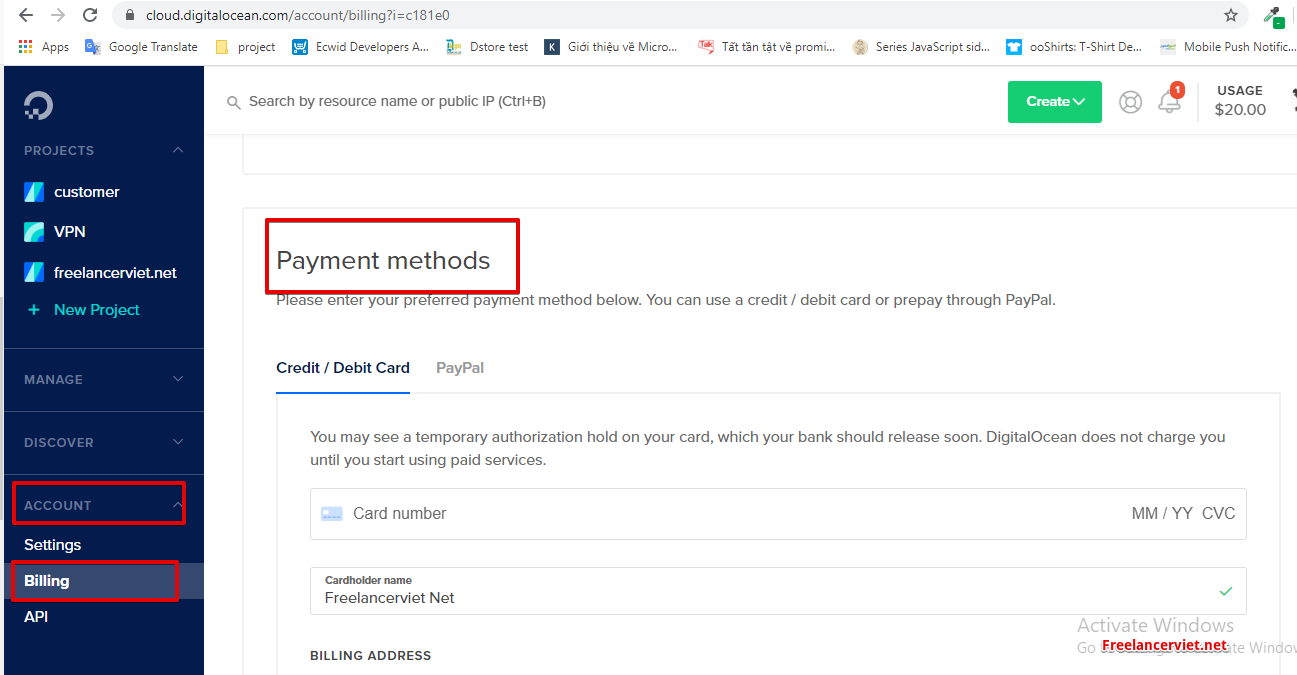
Step 3. After activating your account, go to homepage to add money to your account.
Select Account => Billing => Scroll down to Payment method and enter card information or select Paypal
You must enter the amount and when you use the debit card, the money will be automatically deducted monthly until you turn off the VPS you are using. (Should deposit a minimum of $ 50 to enjoy the promotion of Digital ocean)
Step 4. After the deposit is complete, go to the Project section to start creating VPS Select Project => New Project
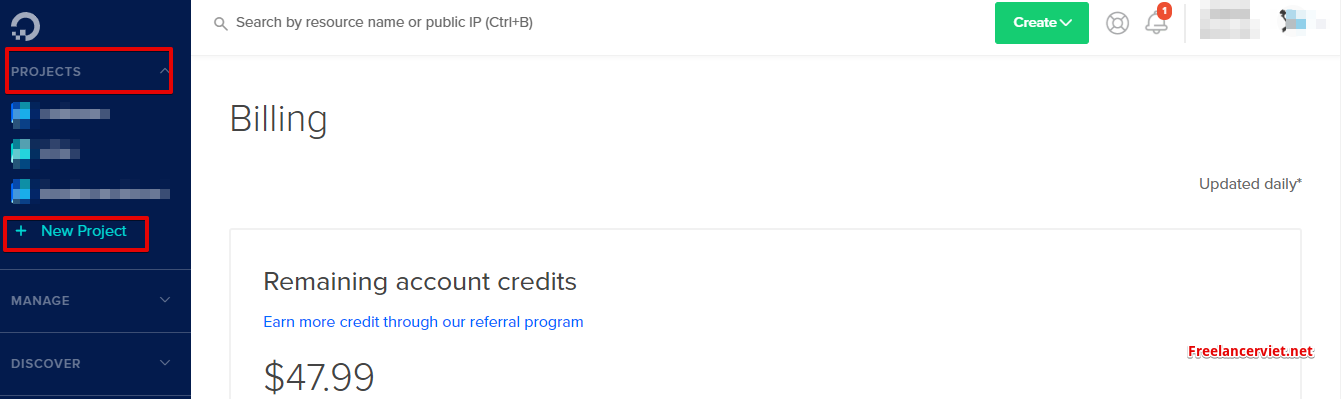
Fill project name in Section Name of project (whatever name also) Section Tell us what it’s for :Choose harrowing one. Click Create project
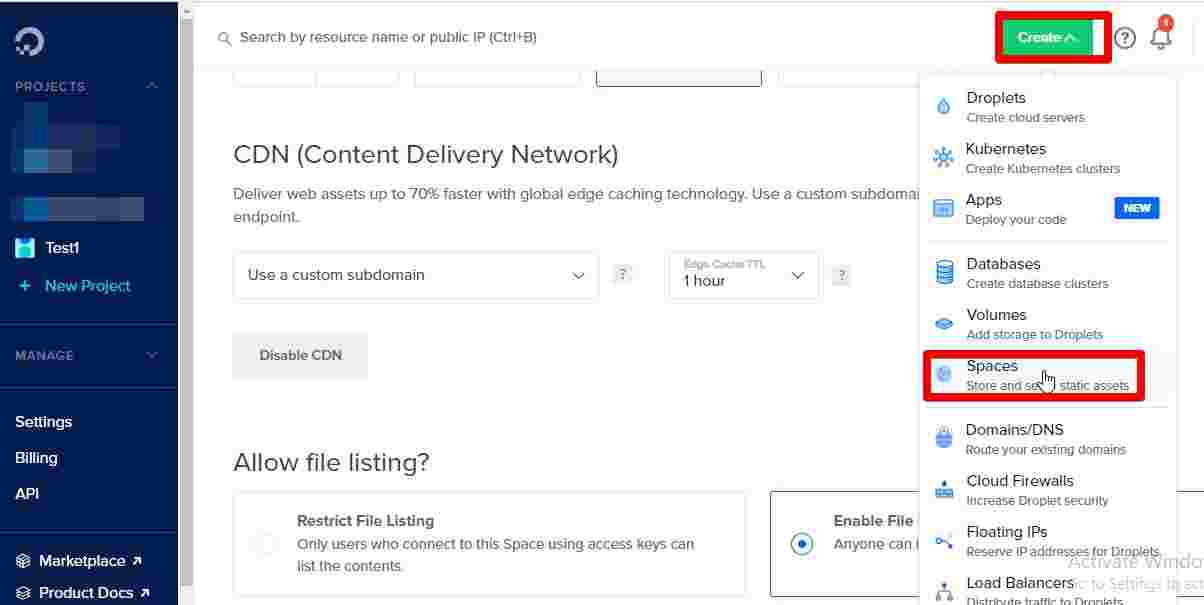
Step 5. Press Create button then choose Space to create new space
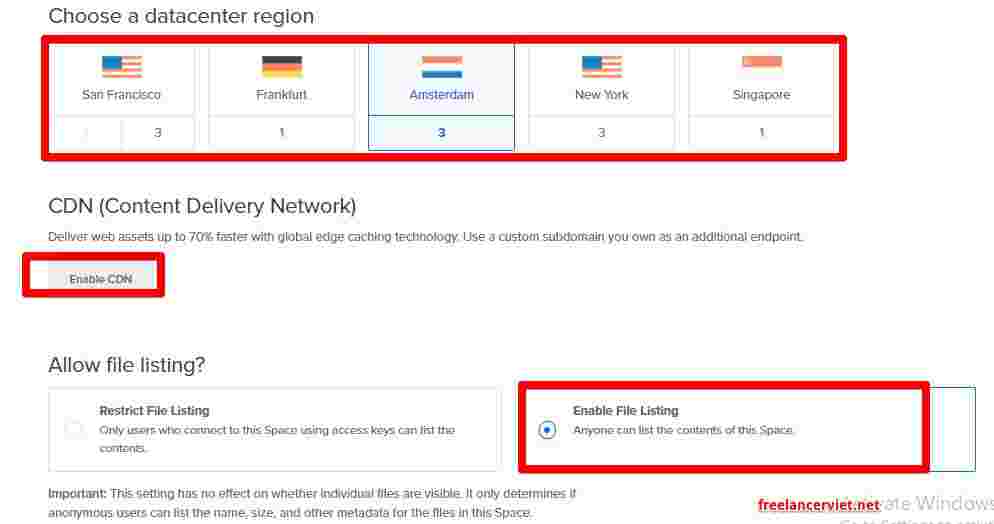
There are some config before create Space:
- Datacenter region you’d like your Space to be in, the region should be near your customer for more faster (see below picture)
- CDN: remember click Enable CDN to allow CDN (see below picture)
- Allow file listing: Choose Enable File listing to allow customer can see file in the CDN
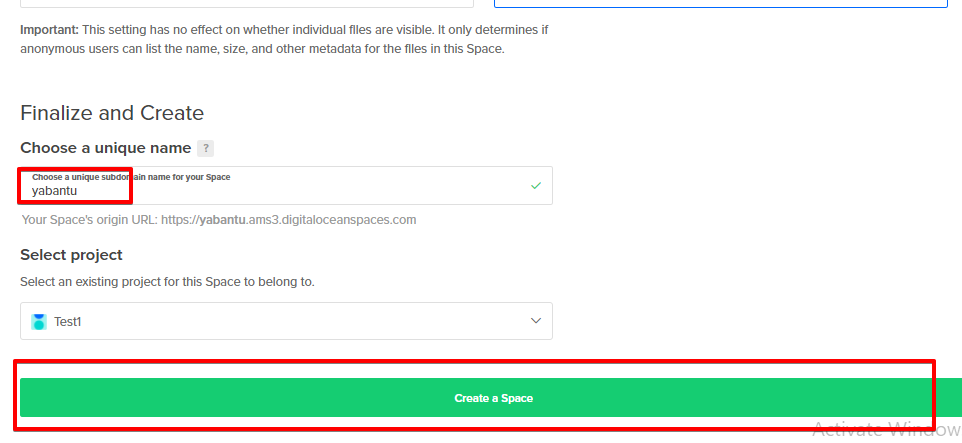
- Choose a unique name: choose a name for your space. This name must be unique among all Spaces (that is, no other Spaces user can have the same name in any region), must be 3–63 characters long, and may only contain lowercase letters, numbers, and dashes.
Finally press Create a space button
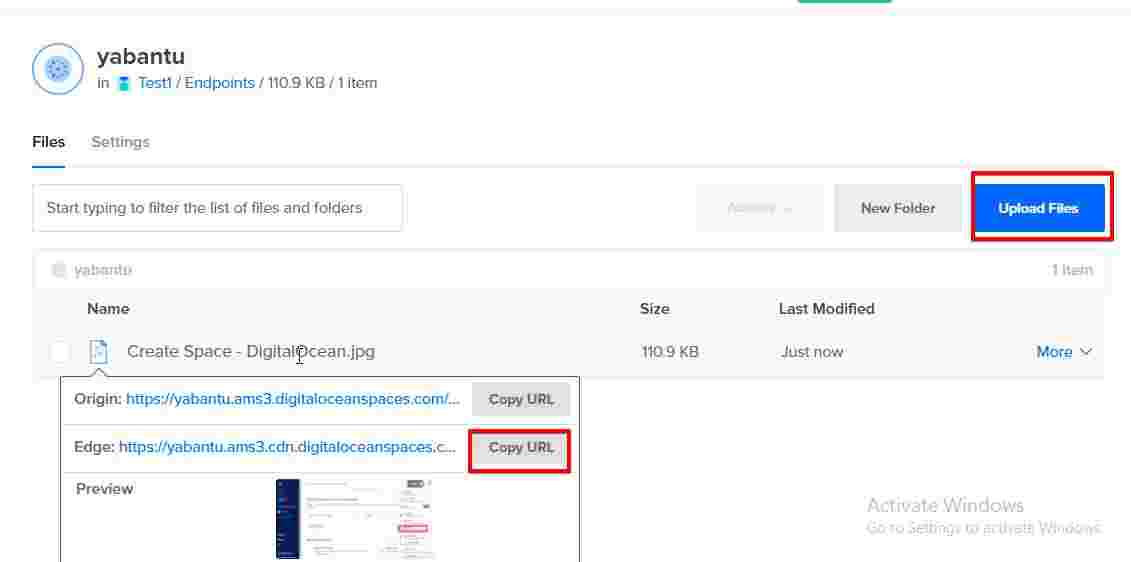
Wait some minute until the screen appear, your CDN is created.
You can press upload files button to upload test file to your CDN. Remember choose Public when upload file. After that you can hover the file to get Edge that is cdn link
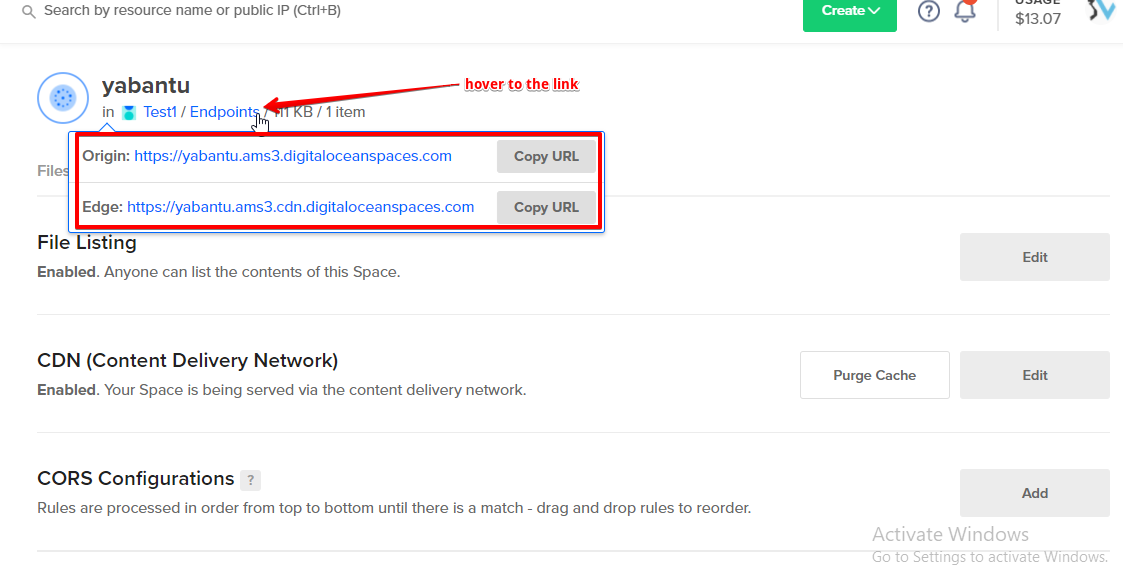
Step 6: in order to access space from your website you need to generate access key for your CDN
First take note endpoints by hover Endpoint link below your CDN name like below picture
Go to API in left side bar, Press generate new key button in Space access keys section
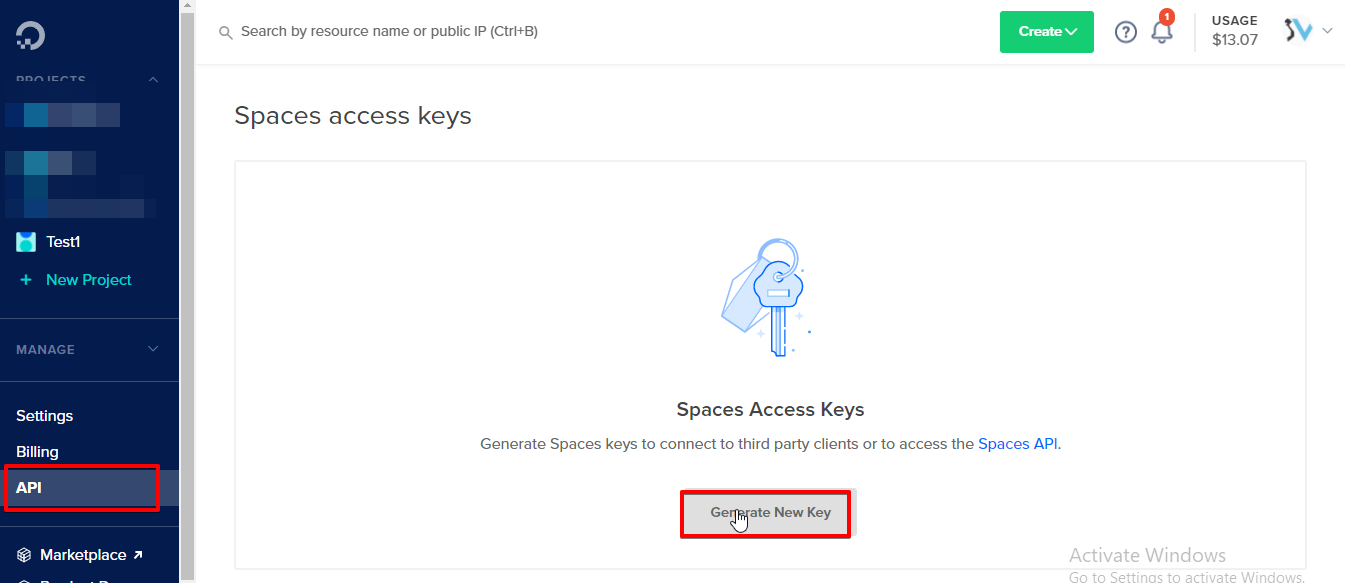
Type a name: it should be same as your above CDN name, then Enter.
After that take note 2 record like below picture. The first is our access key. This is not secret and will continue to be visible in the Control Panel. The second string is your secret or secret key. This will only be displayed once. Record it in a safe place for later use  Conratulation, you are finish setup!
If still not clear you can see the video for more easy to setup your CDN https://www.youtube.com/watch?v=ETfzaw4WNiw
For php package to implement the Digital Ocean CDN, it same as s3 package in Laravel, just fill in key corresponding with s3 key
In order to integrate with your website using PHP laravel then read the article: Using DigitalOcean Spaces for Laravel Object Storage (snapshooter.com)