
 Tiếng Việt

Before signing up, you need an international credit card like Visa or Mastercard already available. Or you can also use paypal account.
Step 1. Click here to register an account (you will be given $ 100 to your account).
Click the “Sign Up” button. Fill out the form here and click the “SIgn up with gmail” button. 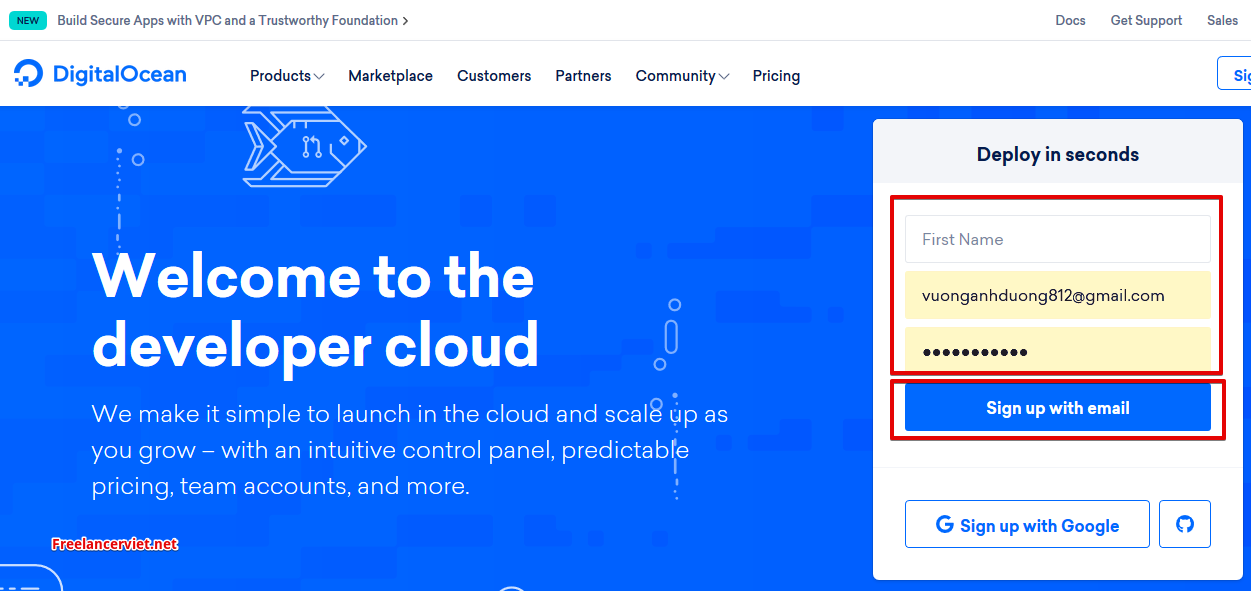 Step 2. Go to the email that you have registered with digital ocean, Digital ocean has sent you an email to activate your account. In that email, click on the active link to activate the account.
Step 3. After activating your account, go to homepage to add money to your account.
Select Account => Billing => Scroll down to Payment method and enter card information or select Paypal In case you choose Paypal, you must enter the amount and when you use the debit card, the money will be automatically deducted monthly until you turn off the VPS you are using. (Should deposit a minimum of $ 50 to enjoy the promotion of Digital ocean) 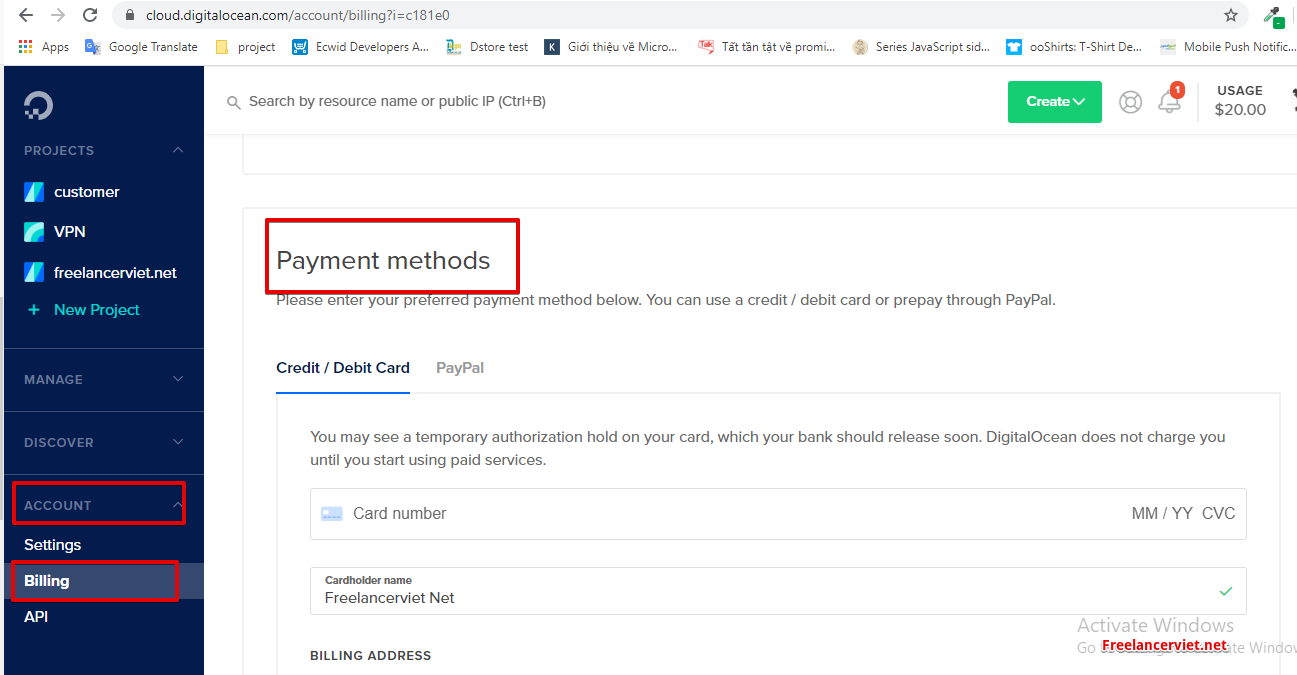
Step 4. After the deposit is complete, go to the Project section to start creating VPS Select Project => New Project 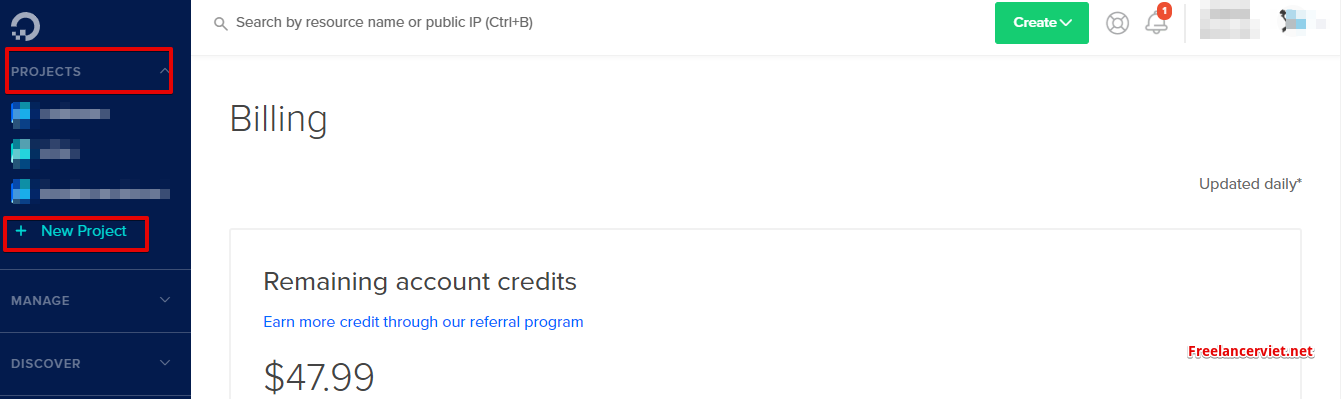 Fill project name in Section Name of project (whatever name also) Section Tell us what it’s for : Choose harrowing one. Click Create project
Step 5. Click Get started with a droplet to create new VPS. 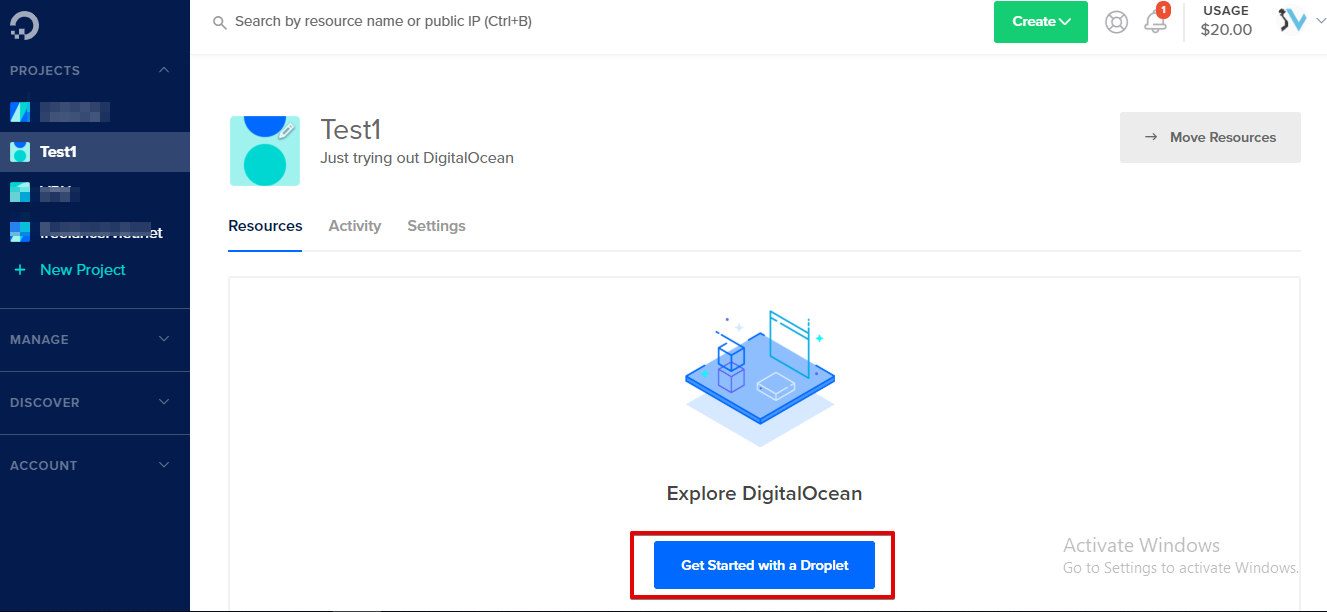
Step 6. Choose a configuration for the server. If you create hosting to make a website, then choose the following configuration:
- Image section choose CentOS 7.6×64
- Plan option choose the lowest $ 5 / month (this hosting can be used for 2 to 3 websites)
- Datacenter region select where you want the number of customers to visit update most (Select singapore if in Vietnam) –
- Authentication section select Password => Type in your password in the Create root password box (the password must be 8 characters or more, with 1 uppercase letter not at the beginning or the end) , 1 number and end with a lowercase non-numeric character, or special characters
Press Create Droplet . 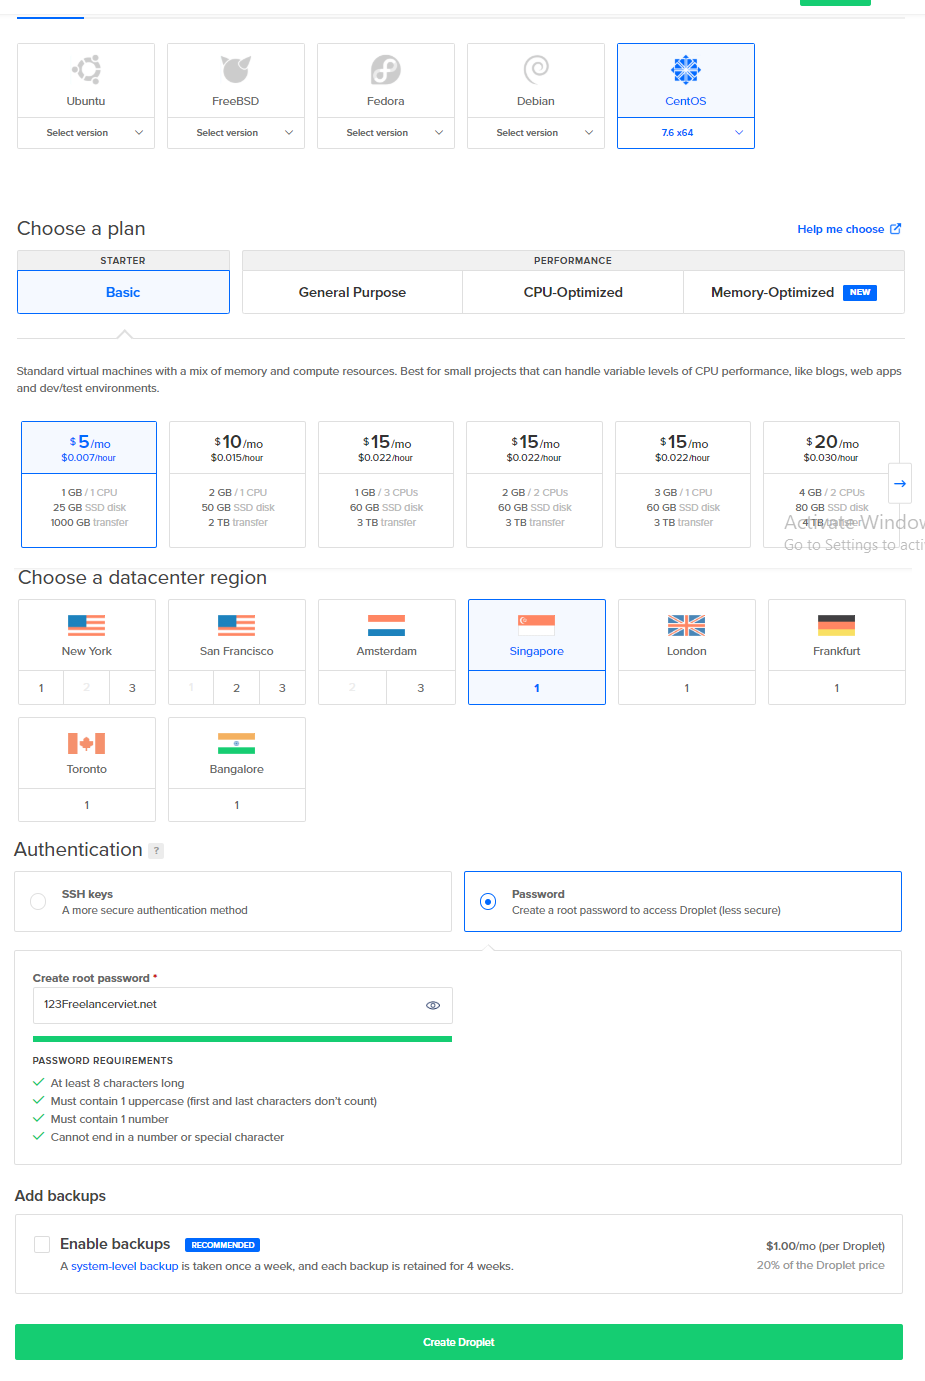 That’s it, then Digital ocean will email you about VPS information. You can login to that VPS using Putty or Xshell software with the IP and password you entered in step 6.
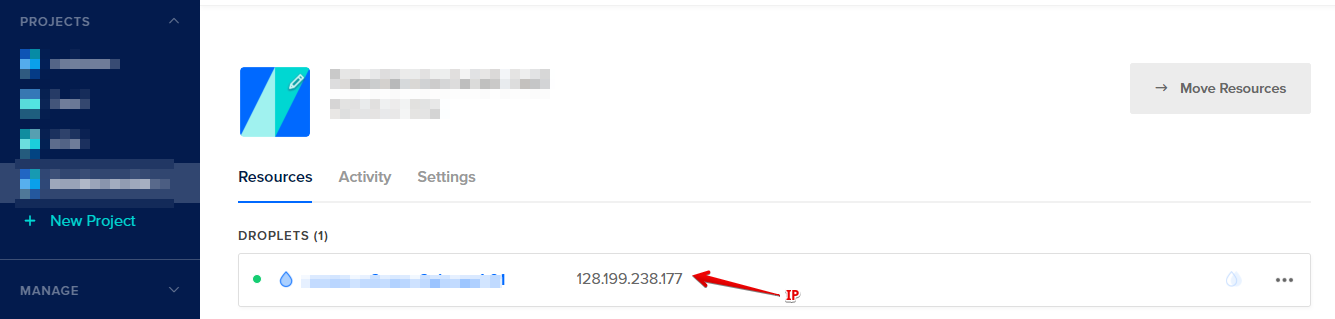
After that, you can setup website due to the instruction